Thursday, September 16, 2010

Sometimes.... it's all in the finishing touches

When creating with polymer clay I have discovered that it is very important not to discard your work while in production. There will be times when you feel like you have not achieved your intended look, or the clay does not move you in it's present state and you might feel like scraping it and starting over. I have done this many times and have used the clay as scrap for creating the bases for cabochons, or for filling gaps, things like that. It was not until I started to experiment with fabrications that I noticed the transitions that the clay goes through, it has this amazing reaction to the heat generated by the buffing wheel that really changes it's total appearance and not just a bit.
Unfinished clay, no sanding or buffing. 

Same cabochon, sanded and buffed!
 I was trying to achieve a twist on a Chatoyant cane (Donna Kato's technique, it means to "shine like a cats eye") that was as reflective as a cats eye.  I was creating pieces inspired by Mars and Aliens, and I figured that this would be a great addition to this collection. It seems to me that there is an inner glow coming from Mars and I wanted to interpret that. When I started to sand and buff the baked clay that was mica shift, I could see a difference in the clay just after sanding and it changes with every grade of paper you use. Then when I was done with three grades of paper and started to buff them, all of a sudden there is depth, and texture, and your work starts to take on a more solid and substantial look.
And the more you buff the more detail comes out. Also if you add heat to the surface, ( I use a blow dryer on high) and get it really close to the clay, it makes the translucent more transparent, adding even more depth and removing any cloudy areas!

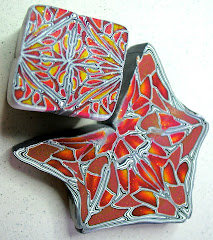
Chainmialle... lace finishing touches, but not yet sanded or buffed.

The depth in these pieces is achieved by mixing the clays with 50% translucent clay before mica shift, then skinner blend the clays together, stacking them and slicing in the diagonal. However, without sanding and buffing these pieces, or applying heat, they would be simply flat looking pieces of clay. It is all in the finishing touches with polymer clay, you could do all the blending and mica shifting you want, but if you are not going to apply these finishing touches, your blending and mica shift won't show up as much!


Take a little time to try these finishing touches and see the difference in your work, I am enjoying the tangibility of my polymer clay pieces now and do not stop shy of finishing every piece. Never make a jugement about your piece until it is completely finished, it will come to life if you give it a chance! Look at the pic's of the same cabochon, before and after finishing touches, it is amazing!

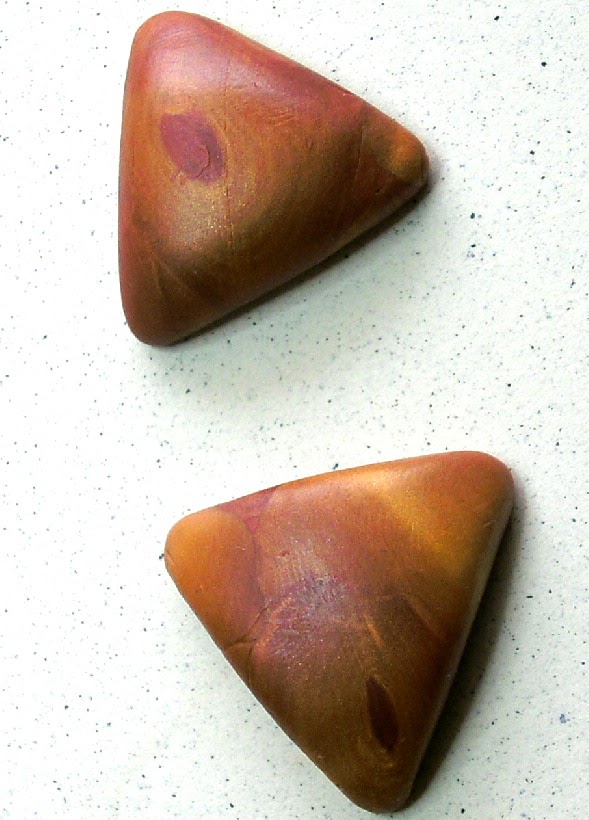
Sanded but not yet buffed, they will be shined up nicely!


Remember to always create, and take time to finish each piece!

Friday, July 23, 2010

Learning Folded Beads!


These are amazing beads and really important, in my opinion as they are ancient and some of the very first decorative beads around. Ancient Islamic Folded Beads, have captivated many an artist, with their seemingly impossible to replicate construction. I have read many stories of artists trying to replicate them, even spending years dedicated to reproducing these amazing beads, that seem to elude most.

I must admit, I love a challenge and decided to try and see if I could discover how to create them, if only for my own sense of accomplishment. I am not a glass artist, so I thought about polymer clay and how it adapts so well to the other glass techniques, like cane work... that look of milifiori, actually was achieved with molten glass. So in conditioning my clay, I was trying to put myself in the shoes of these Islamic artists who created this technique.... not an easy thing to do. I started to play and create with my clay, I tried stacking it in snakes and layering it, cutting the snakes and redistributing the lines to try and create the same pattern, but nothing looked even similar to them.


Well, I finally was able to create my won folded beads that look a lot like these original ones! Since discovering this method, I have created so many different shapes methods and techniques for creating unique and original folded beads.... not ancient, but these are as close to them as I have seen.
I have been blessed with a tenacity that does not allow me to quit, and i am thankful for that!

Here are some of my folded beads, please do a search to see more pic's of the original folded beads and compare them to min and you will see the similarities are very apparent... I am jazzed!
I can teach anyone to create them.... maybe a class!??? By the way, round beads are to simple, I wanted to create differnt shapes and am even creating connectors that are folded and pendant... really fun!


Here is a necklace with 3 fabricated  Ivory Folded beads, these beads are the ones pictured in all white!
Let me know what you think... I would love to start a class.... any interest!??
Don't forget to comment, say hello or follow! =)

Sunday, July 18, 2010

Reproductions... Amazing!

I wanted to try my hand at reproducing early jewelry pieces, like form the pre Colombian era, and pre Classic eras. Those hard to find ornately decorated and expertly crafted pieces of wearable art.


I purchased a book by Daniel and Serga Nadler, Silver, from fetish to fashion. It is a book about their travels and their found love for Ethnic Jewelry, together they fell in love with each other and jewelry collecting. With their bond and love for one another they have amassed a huge collection of primer, gallery quality, pieces of Silver masterpieces.


Their collection has inspired me so much that I want to now recreate them, but in polymer clay and metals, and try my best to make them look close to the actual pieces. I have always been one to challenge myself, and this will be a challenge, as these are the finest pieces of jewelry I have seen, and they are actual pieces form their origination. They would travel to India, Pakistan, S.E, Asia, just every where, and would deal with tribes people and collectors to get the very best pieces they could find from all over the world.
This is my first try at creating with this book as inspiration... what do you think, i can use some feedback, really I could. Please feel free to comment... Thank you so much.


Friday, May 28, 2010

Chatoyant Snail Rolls! Mica Shift Tricks, The Learning Curve!

 Chatoyant (cat eye like) snakes, notice the bar of light in the very center.

Creating what looks to be a really amazing way of making my work shine and reflective.
I was crazy about mica shift technique when I first tried it. I thought how easy is this, and how beautiful. I then started reading more on the subject and how one can achieve amazing results by playing with the mica particles after being shifted. I love to read on and learn as much as I can even before even trying it out, at least that's what I do now!
The necklace and beads I created with that first tiny cane.

Well today I decided I read enough, know enough and was curious enough to finally try something other then a mica shift or skinner blend and the two intermixed. I want that reflective quality one can achieve by learning how to add depth and texture, without executing a simple ghost image, or using a stamp to disrupt the mica particles then shaving the surface level. I want this reflective quality going all the way through, the entire piece from front to back and that is something I have not yet seen in my work. 


Triangle cabochons covered with the chatoyant snail slices.
I had created a skinner blend/mica shift/metallic cane, I was experimenting and I created this incredible cane, but instead of writing down what I did, and thinking about how to best utilize this miniature cane that was so small. I instead stared to slice it and make beads out of it, I was excited to see what was inside.


Chatoyant Gold Metallic/Translucent Snail Roll.

Only to learn later that I should have sliced it extremely thin, arranged it on a sheet of base clay and rolled it out in all directions to make a large patterned sheet .... then you can start to decorate with a whole sheet instead of tiny square pieces.

 Several Metallic Chatoyant Canes, two are skinner blend metallic colors.

 Sliced Chatoyant Rolls Placed On A Sheet of Metallic clay and is covering those tiny cabs.

I want to start my blog feature called "Learning Curve" where I discuss and share my experiments and learned techniques complete with the original creators techniques and the techniques I have developed to use it in my own way. I explore and look for way to be innovative even before start to create, and would love to share, encourage and inspire others to create with aspirations of being innovative. Does that sound like something you'd like to read? Please let me know with a comment and please feel free to post your links to similar work or findings, or just post questions. I will answer all! I will get a detailed bases for this section, as I want those who post links to be innovators or at the very least explorers using Polymer Clay. Artist and enthusiasts who are bending the the curve and want to share and explore other possibilities of innovation and creation.

Miniature Mask Exchange! Who wants to participate?

I read about a miniature mask exchange, where artists created miniature masks to collect other artists work. I have seen some amazing work from you all and believe this would be amazing inspiration and it would create a niche for us as a group and a great promotion tool.

The artists involved in this online exchange would create masks and send them to a "mask master" and that master, would send each artist one of the other artists mask. And she had collected hundreds of really cool ornate miniature masks and permanently affixed them to a turquoise felt covered piece of wood and it look amazing. I would love to start a miniature mask exchange, would anyone want to participate? Please let me know,  I will start it on my own and hope others want to participate.


I love the idea of collecting other PC artists work and this seems the best way to do it, and everyone benefits! And it can become for all involved a great collection of art, so what do you say?
As you can see I am already creating miniature masks, this is my very first attempt and I am letting happen organically. I think she is going to be my Paisley Goddess! She is not pretty, but she is the Princess nest in line to the throne! =) With that nose she could be a vaudeville sensation! 


To those interested in participating, leave a comment here and we will see if we can't get this started! This exchange would be open to Polymer Clay artists only, others will be open to all artists! One thing remains the same, they Must be within 6 inches total! Don't forget to comment and be included.