 |
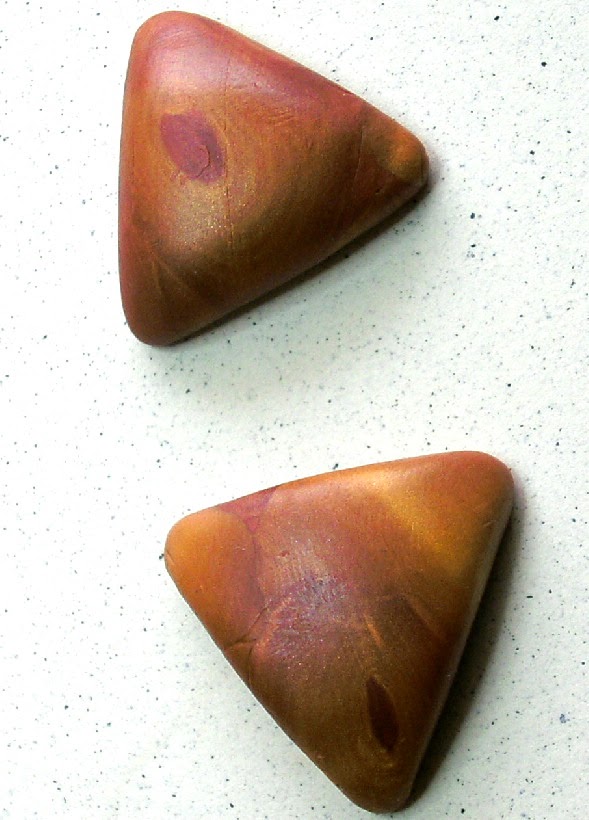
| Sanded and Buffed cabochon, what looks like gloss is actually liquid translucent clay. |
The idea of sanding your polymer clay pieces, can be a little intimidating and some what confusing.
If you have never used sand paper on polymer clay it can be tricky at best, but with practice and of course trial and error you to can master a beautiful sheen or high shine on any polymer clay project. The difference between sanding/buffing and glossing is a personal choice, but one is better then the other... if you are dedicated to your clients and your work ... a gloss just wont do!
First of all let me start by saying, "never dry sand, polymer clay" the particles that are released are toxic, so you must use water when sanding. This means purchasing wet/dry sandpaper at your local auto parts shop.
You can do most all of your sanding with 320, 400, 600, grits there is no need to buy a higher grade.
I have found this is all the paper you need to give your projects a professional looking shine.... if your technique is right and you have the proper tools... yes, knowledge is a tool, probably thee most important tool you have!
First thing is to make your sanding area clean and easy to navigate, try and have a format in place to keep your time to a minimum. I also would suggest that you sit while you are sanding, leaning over a bowl of water for hours sanding can cause some serious back pain, trust me! The water level does not have to be a lot, it can be a little puddle as long as you do not let the sanding area get dry, you will be fine. I use the sink in my laundry room, I place about one inch of water (cold water, warm water will make the clay too soft and mar your work) I work methodically, but with a very light hand, especially when using the 320 grit, as it can leave deep crevices in your work that are difficult to remove completely! Remember it is only clay and not much pressure is needed!
The baked surface of polymer clay is equal to 400 grit paper, that is not to say that you can't start with 400, but I have found that starting with 320, brings up more definition and luster. So in my opinion 400 grit should be the second or middle grit. If 320 grit is used it will take the first layer of clay down to the patterning and into the layering, bringing out the effects of the clay to stunning effects.
When sanding, it is important to know a couple of important things to be sure your sanding will not destroy but enhance your piece to a level of excellence! I can not stress enough how important is it to use a light hand, with light, and even strokes, let the paper do the work. Never skip grades of paper when sanding, as each grade removes the ridges created by the previous grade. If you skip grades, it will be removing only the top part of the ridges and you will see these striations in your finished design.
When starting to sand use long strokes in the same direction for every grade of paper, and change directions with each grit. In other words, go from right to left with 320, then from top to bottom with 400, then right to left with 600, switching it up with every grade of paper. Each consecutive grit of paper will be sanded in the opposite direction as the one prior. This will allow you to see when the sanding has removed all the marks of the previous paper. Once all the marks made in the opposite direction are gone, you can proceed with the next grade.... But not before!
I have learned that you can achieve a great shine with the right tools and not too much work. I have been creating my own tools for making this process easier and I must say that the right tool for the job makes all the difference in the world. I will continue to share tips and tricks with you all, for creating and making it easier to create, more effectively! I would love to hear from you all, your comments mean a lot!
 | ||||
| Sanded and buffed, to a high shine, with 320, 400, 600, and look at that beautiful finish! |
What do you use to buff with? I have created a buffing wheel that is amazing and is the reason for me being able to achieve all my high shine finishes. Before I created this buffing wheel, I could not achieve this shine. I spent hours trying to achieve a high shine, and got nothing but a cloudy looking, overworked piece. But with this buffing wheel, I don't need any more then a 600, grit paper to achieve this look, most need to sand all the way up to1200 grit to get this shine. The right tool for the job makes all the difference in the world!
Want to know what this buffing wheel is, or how you can create one for yourself? It will elevate your finished pieces by leaps and bounds! Ask me about it and I might make a tutorial on it! Every polymer clay artist should own one, maybe I should think about marketing it huh??? =)
If you have any questions please feel free to comment, post your questions and I will answer them. If I do not have the answer I will search high and low for the right one! Have a great day and remember to create daily!