Showing posts with label creation process. Show all posts

Monday, September 27, 2010

The Learning Curve... Sand or Gloss?

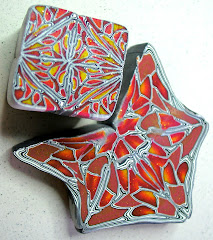
Sanded and Buffed cabochon, what looks like gloss is actually liquid translucent clay.

 The idea of sanding your polymer clay pieces, can be a little intimidating and some what confusing.
If you have never used sand paper on polymer clay it can be tricky at best, but with practice and of course trial and error you to can master a beautiful sheen or high shine on any polymer clay project. The difference between sanding/buffing and glossing is a personal choice, but one is better then the other... if you are dedicated to your clients and your work ... a gloss just wont do!

First of all let me start by saying, "never dry sand, polymer clay" the particles that are released are toxic, so you must use water when sanding. This means purchasing wet/dry sandpaper at your local auto parts shop.
You can do most all of your sanding with 320, 400, 600, grits there is no need to buy a higher grade.
I have found this is all the paper you need to give your projects a professional looking shine.... if your technique is right and you have the proper tools... yes, knowledge is a tool, probably thee most important tool you have!

First thing is to make your sanding area clean and easy to navigate, try and have a format in place to keep your time to a minimum. I also would suggest that you sit while you are sanding, leaning over a bowl of water for hours sanding can cause some serious back pain, trust me! The water level does not have to be a lot, it can be a little puddle as long as you do not let the sanding area get dry, you will be fine. I use the sink in my laundry room, I place about one inch of water (cold water, warm water will make the clay too soft and mar your work) I work methodically, but with a very light hand, especially when using the 320 grit, as it can leave deep crevices in your work that are difficult to remove completely!  Remember it is only clay and not much pressure is needed!

The baked surface of polymer clay is equal to 400 grit paper, that is not to say that you can't start with 400, but I have found that starting with 320, brings up more definition and luster. So in my opinion 400 grit should be the second or middle grit. If 320 grit is used it will take the first layer of  clay down to the patterning and into the layering, bringing out the effects of the clay to  stunning effects.

When sanding, it is important to know a couple of important things to be sure your sanding will not destroy but enhance your piece to a level of excellence! I can not stress enough how important is it to use a light hand, with light, and even strokes, let the paper do the work. Never skip grades of paper when sanding, as each grade removes the ridges created by the previous grade. If you skip grades, it will be removing only the top part of the ridges and you will see these striations in your finished design.

When starting to sand use long strokes in the same direction for every grade of paper, and change directions with each grit. In other words, go from right to left with 320, then from top to bottom with 400, then right to left with 600, switching it up with every grade of paper. Each consecutive grit of paper will be sanded in the opposite direction as the one prior. This will allow you to see when the sanding has removed all the marks of the previous paper. Once all the marks made in the opposite direction are gone, you can proceed with the next grade.... But not before!

I have learned that you can achieve a great shine with the right tools and not too much work. I have been creating my own tools for making this process easier and I must say that the right tool for the job makes all the difference in the world. I will continue to share tips and tricks with you all, for creating and making it easier to create, more effectively! I would love to hear from you all, your comments mean a lot!

Sanded and buffed, to a high shine, with 320, 400, 600, and look at that beautiful finish!


What do you use to buff with? I have created a buffing wheel that is amazing and is the reason for me being able to achieve all my high shine finishes.  Before I created this buffing wheel, I could not achieve this shine. I spent hours trying to achieve a high shine, and got nothing but a cloudy looking, overworked piece.  But with this buffing wheel, I don't need any more then a 600, grit paper to achieve this look, most need to sand all the way up to1200 grit to get this shine. The right tool for the job makes all the difference in the world!

Want to know what this buffing wheel is, or how you can create one for yourself? It will elevate your finished pieces by leaps and bounds!  Ask me about it and I might make a tutorial on it! Every polymer clay artist should own one, maybe I should think about marketing it huh??? =)

If you have any questions please feel free to comment, post your questions and I will answer them. If I do not have the answer I will search high and low for the right one! Have a great day and remember to create daily!

Friday, July 23, 2010

Learning Folded Beads!


These are amazing beads and really important, in my opinion as they are ancient and some of the very first decorative beads around. Ancient Islamic Folded Beads, have captivated many an artist, with their seemingly impossible to replicate construction. I have read many stories of artists trying to replicate them, even spending years dedicated to reproducing these amazing beads, that seem to elude most.

I must admit, I love a challenge and decided to try and see if I could discover how to create them, if only for my own sense of accomplishment. I am not a glass artist, so I thought about polymer clay and how it adapts so well to the other glass techniques, like cane work... that look of milifiori, actually was achieved with molten glass. So in conditioning my clay, I was trying to put myself in the shoes of these Islamic artists who created this technique.... not an easy thing to do. I started to play and create with my clay, I tried stacking it in snakes and layering it, cutting the snakes and redistributing the lines to try and create the same pattern, but nothing looked even similar to them.


Well, I finally was able to create my won folded beads that look a lot like these original ones! Since discovering this method, I have created so many different shapes methods and techniques for creating unique and original folded beads.... not ancient, but these are as close to them as I have seen.
I have been blessed with a tenacity that does not allow me to quit, and i am thankful for that!

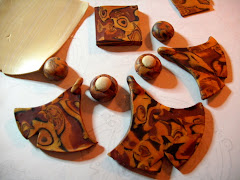
Here are some of my folded beads, please do a search to see more pic's of the original folded beads and compare them to min and you will see the similarities are very apparent... I am jazzed!
I can teach anyone to create them.... maybe a class!??? By the way, round beads are to simple, I wanted to create differnt shapes and am even creating connectors that are folded and pendant... really fun!


Here is a necklace with 3 fabricated  Ivory Folded beads, these beads are the ones pictured in all white!
Let me know what you think... I would love to start a class.... any interest!??
Don't forget to comment, say hello or follow! =)

Sunday, July 18, 2010

Reproductions... Amazing!

I wanted to try my hand at reproducing early jewelry pieces, like form the pre Colombian era, and pre Classic eras. Those hard to find ornately decorated and expertly crafted pieces of wearable art.


I purchased a book by Daniel and Serga Nadler, Silver, from fetish to fashion. It is a book about their travels and their found love for Ethnic Jewelry, together they fell in love with each other and jewelry collecting. With their bond and love for one another they have amassed a huge collection of primer, gallery quality, pieces of Silver masterpieces.


Their collection has inspired me so much that I want to now recreate them, but in polymer clay and metals, and try my best to make them look close to the actual pieces. I have always been one to challenge myself, and this will be a challenge, as these are the finest pieces of jewelry I have seen, and they are actual pieces form their origination. They would travel to India, Pakistan, S.E, Asia, just every where, and would deal with tribes people and collectors to get the very best pieces they could find from all over the world.
This is my first try at creating with this book as inspiration... what do you think, i can use some feedback, really I could. Please feel free to comment... Thank you so much.


Thursday, April 8, 2010

My line Origins... The beginning!


Was a flash in the pan, I was thinking about a new line and in my research I found that all areas had been tapped out. There are so many Jewelry designers out there, and so many great ideas it is getting harder and harder to come up with new ideas... ones that not have already been done.

Ideas that will catch on and hopefully become the next big thing, are not easy to come up with, and I am one who likes to come up with new uses for everyday components. It is part of my creation process, pushing and testing myself to create more with a toggle clasp then using it for it's original use. This allows me to imagine and put my creative mind to work, it is a simple yet really effective way of keeping my imagination working and sharp.

I find that my subconscious mind works better then me trying to make something happen, I leave it to my intuition to work it out or rather to do what I feel. In this way it is easy for me to continue with the more difficult task of figuring out the "mechanics" of the piece. I learned to concentrate more on the way a piece is going to lay on the body, and how it is going to behave when worn, rather then what colors it will be. Everything seems to work itself out from there.

I was not sure of anything when I started out in the early 90's creating jewelry... I just needed money and had all these crafts I knew how to do, from camp and from my mother. She owned a gift shop and we her children would make all the gifts.... Child free labor... they call it these days! =) I learned how to do just about everything, including knitting and embroidery... how embarrassing!  I mean she pushed us to finish product and stressed us out to do it!  But without that "guidance" I will call it... I would not have had the knowledge to create in the first place and would never had been able to turn my last US $300.00 into US $1,600.00 by creating beautiful necklaces and selling them at Magic Mountain... I sold every last one!

So needless to say I have learned to follow my intuition very early on and it always works for me.
So when I started to try to figure what direction to go, there were just to many visuals coming into my minds eye and was clouding my perception and making it difficult to come up with anything. So I listened to my intuition and decided to create a new beginning... Origins.... The Beginning!  And I am happy to say it is selling, I have sold 7 pieces from this line already and that is a great start for me, so I am happy and inspired!

This collection is my first break from creating with a structured technique, this collection is all about the very first pieces of personal adornment and what those pieces might have looked like. So it is interpretive on my part and the viewers part as well as they are pushed to ask, what is this... this new beginning. And do they look like they could have been created by our very first intelligent ancestors.
Do these pieces look like relics or authentic enough to pass??? You have to answer these questions, I will try my best to keep you guessing and waiting to see the next piece from my new line, Origins... The Beginning!