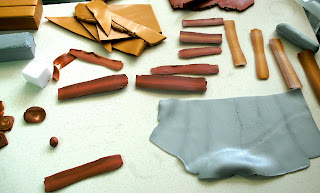
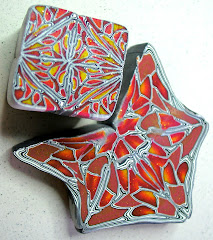
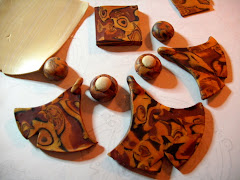
Monday, September 27, 2010

The Learning Curve... Sand or Gloss?

Sanded and Buffed cabochon, what looks like gloss is actually liquid translucent clay.

 The idea of sanding your polymer clay pieces, can be a little intimidating and some what confusing.
If you have never used sand paper on polymer clay it can be tricky at best, but with practice and of course trial and error you to can master a beautiful sheen or high shine on any polymer clay project. The difference between sanding/buffing and glossing is a personal choice, but one is better then the other... if you are dedicated to your clients and your work ... a gloss just wont do!

First of all let me start by saying, "never dry sand, polymer clay" the particles that are released are toxic, so you must use water when sanding. This means purchasing wet/dry sandpaper at your local auto parts shop.
You can do most all of your sanding with 320, 400, 600, grits there is no need to buy a higher grade.
I have found this is all the paper you need to give your projects a professional looking shine.... if your technique is right and you have the proper tools... yes, knowledge is a tool, probably thee most important tool you have!

First thing is to make your sanding area clean and easy to navigate, try and have a format in place to keep your time to a minimum. I also would suggest that you sit while you are sanding, leaning over a bowl of water for hours sanding can cause some serious back pain, trust me! The water level does not have to be a lot, it can be a little puddle as long as you do not let the sanding area get dry, you will be fine. I use the sink in my laundry room, I place about one inch of water (cold water, warm water will make the clay too soft and mar your work) I work methodically, but with a very light hand, especially when using the 320 grit, as it can leave deep crevices in your work that are difficult to remove completely!  Remember it is only clay and not much pressure is needed!

The baked surface of polymer clay is equal to 400 grit paper, that is not to say that you can't start with 400, but I have found that starting with 320, brings up more definition and luster. So in my opinion 400 grit should be the second or middle grit. If 320 grit is used it will take the first layer of  clay down to the patterning and into the layering, bringing out the effects of the clay to  stunning effects.

When sanding, it is important to know a couple of important things to be sure your sanding will not destroy but enhance your piece to a level of excellence! I can not stress enough how important is it to use a light hand, with light, and even strokes, let the paper do the work. Never skip grades of paper when sanding, as each grade removes the ridges created by the previous grade. If you skip grades, it will be removing only the top part of the ridges and you will see these striations in your finished design.

When starting to sand use long strokes in the same direction for every grade of paper, and change directions with each grit. In other words, go from right to left with 320, then from top to bottom with 400, then right to left with 600, switching it up with every grade of paper. Each consecutive grit of paper will be sanded in the opposite direction as the one prior. This will allow you to see when the sanding has removed all the marks of the previous paper. Once all the marks made in the opposite direction are gone, you can proceed with the next grade.... But not before!

I have learned that you can achieve a great shine with the right tools and not too much work. I have been creating my own tools for making this process easier and I must say that the right tool for the job makes all the difference in the world. I will continue to share tips and tricks with you all, for creating and making it easier to create, more effectively! I would love to hear from you all, your comments mean a lot!

Sanded and buffed, to a high shine, with 320, 400, 600, and look at that beautiful finish!


What do you use to buff with? I have created a buffing wheel that is amazing and is the reason for me being able to achieve all my high shine finishes.  Before I created this buffing wheel, I could not achieve this shine. I spent hours trying to achieve a high shine, and got nothing but a cloudy looking, overworked piece.  But with this buffing wheel, I don't need any more then a 600, grit paper to achieve this look, most need to sand all the way up to1200 grit to get this shine. The right tool for the job makes all the difference in the world!

Want to know what this buffing wheel is, or how you can create one for yourself? It will elevate your finished pieces by leaps and bounds!  Ask me about it and I might make a tutorial on it! Every polymer clay artist should own one, maybe I should think about marketing it huh??? =)

If you have any questions please feel free to comment, post your questions and I will answer them. If I do not have the answer I will search high and low for the right one! Have a great day and remember to create daily!
Tuesday, September 21, 2010

Putting It Out There... BeadDreams 2011


Metallic Clay, copper and gold, unbaked cabochons.
I have decided to enter the BeadDeams competition this year, I have never tried to enter a competition, other the FireMountianGems, contest. Of which I only earned a 3rd place and an honorable mention. This was with my bead work and was many years ago. This BeadDreams competition has several categories and I am going to enter pieces in three of them. I have been really inspired by my work with polymer clay and am curious to see how it fairs, or what others think of my work. I have only been working with it for about 6 months but really believe that I can do well, in this competition. All of my work is detail oriented,  completely finished pieces and  they are made extremely well. So, I am going to try it out.


Metallic clays, Skinner blend, mica shift medallion, pre Colombian inspired.
Being curious for a while about my polymer clay work, wondering if others can see what I am trying to achieve with polymer clay. I often see these extremely bright colored pieces, with organic shapes and several patterns going on. Often times there is a "favorite" method of caning like the extruded cane, that gets over used and under worked and seems to be on every web site. Another example would be Mokume Gane in neon colors and ghost imaging, I see a lot of necklaces that feature these methods.


What I am trying to achieve with my polymer clay pieces, is to elevate the look of polymer clay to "Fine Jewelry" not just the characterful, whimsical and trendy looking pieces that is is currently associated with. This is what I want my polymer clay work to become and what I am always striving for.

Jurassic Opal fabrication, my own technique.
As of last week, the level of polymer clay respect has been earned, and the negative reaction it had toward some artists, will now pale in comparison. With the announcement of polymer clay being accepted into Museums, and new areas being created in the museums to house polymer clay collections, will definitely change the minds of many  artists who thought of it as just a craft item! Elevating the importance of polymer clay as an art medium, had been a long time goal of many artists for many year! Congratulations!

So I think this is the perfect time for me to step out and introduce my style of art to the people who know good work. I feel my work will do well because my work is not like other polymer clay work. My creations are not loud and covered with wild patterns, my polymer clay work is sophisticated,  innovative and all are one of a kind. Please don't get me wrong, I love those designs with the bold colors and patterns, it is just not my style.... It makes me feel really good when I come up with my own techniques and am able to apply them successfully to a design. I feel great when I look at my work and I see beautiful settings, lovely stone fabrications, and my inspiration, combined. Well just have to see what others think! =)


In any case it will be fun and an experience waiting to see what happens and who wins. I am not expecting to win, but am expecting to have a lot of fun! Wish me luck and say hello! I will be posting pic's of the pieces I am working on for this event! So check back often.

Thursday, September 16, 2010

Sometimes.... it's all in the finishing touches

When creating with polymer clay I have discovered that it is very important not to discard your work while in production. There will be times when you feel like you have not achieved your intended look, or the clay does not move you in it's present state and you might feel like scraping it and starting over. I have done this many times and have used the clay as scrap for creating the bases for cabochons, or for filling gaps, things like that. It was not until I started to experiment with fabrications that I noticed the transitions that the clay goes through, it has this amazing reaction to the heat generated by the buffing wheel that really changes it's total appearance and not just a bit.
Unfinished clay, no sanding or buffing. 

Same cabochon, sanded and buffed!
 I was trying to achieve a twist on a Chatoyant cane (Donna Kato's technique, it means to "shine like a cats eye") that was as reflective as a cats eye.  I was creating pieces inspired by Mars and Aliens, and I figured that this would be a great addition to this collection. It seems to me that there is an inner glow coming from Mars and I wanted to interpret that. When I started to sand and buff the baked clay that was mica shift, I could see a difference in the clay just after sanding and it changes with every grade of paper you use. Then when I was done with three grades of paper and started to buff them, all of a sudden there is depth, and texture, and your work starts to take on a more solid and substantial look.
And the more you buff the more detail comes out. Also if you add heat to the surface, ( I use a blow dryer on high) and get it really close to the clay, it makes the translucent more transparent, adding even more depth and removing any cloudy areas!

Chainmialle... lace finishing touches, but not yet sanded or buffed.

The depth in these pieces is achieved by mixing the clays with 50% translucent clay before mica shift, then skinner blend the clays together, stacking them and slicing in the diagonal. However, without sanding and buffing these pieces, or applying heat, they would be simply flat looking pieces of clay. It is all in the finishing touches with polymer clay, you could do all the blending and mica shifting you want, but if you are not going to apply these finishing touches, your blending and mica shift won't show up as much!


Take a little time to try these finishing touches and see the difference in your work, I am enjoying the tangibility of my polymer clay pieces now and do not stop shy of finishing every piece. Never make a jugement about your piece until it is completely finished, it will come to life if you give it a chance! Look at the pic's of the same cabochon, before and after finishing touches, it is amazing!

Sanded but not yet buffed, they will be shined up nicely!


Remember to always create, and take time to finish each piece!

Friday, July 23, 2010

Learning Folded Beads!


These are amazing beads and really important, in my opinion as they are ancient and some of the very first decorative beads around. Ancient Islamic Folded Beads, have captivated many an artist, with their seemingly impossible to replicate construction. I have read many stories of artists trying to replicate them, even spending years dedicated to reproducing these amazing beads, that seem to elude most.

I must admit, I love a challenge and decided to try and see if I could discover how to create them, if only for my own sense of accomplishment. I am not a glass artist, so I thought about polymer clay and how it adapts so well to the other glass techniques, like cane work... that look of milifiori, actually was achieved with molten glass. So in conditioning my clay, I was trying to put myself in the shoes of these Islamic artists who created this technique.... not an easy thing to do. I started to play and create with my clay, I tried stacking it in snakes and layering it, cutting the snakes and redistributing the lines to try and create the same pattern, but nothing looked even similar to them.


Well, I finally was able to create my won folded beads that look a lot like these original ones! Since discovering this method, I have created so many different shapes methods and techniques for creating unique and original folded beads.... not ancient, but these are as close to them as I have seen.
I have been blessed with a tenacity that does not allow me to quit, and i am thankful for that!

Here are some of my folded beads, please do a search to see more pic's of the original folded beads and compare them to min and you will see the similarities are very apparent... I am jazzed!
I can teach anyone to create them.... maybe a class!??? By the way, round beads are to simple, I wanted to create differnt shapes and am even creating connectors that are folded and pendant... really fun!


Here is a necklace with 3 fabricated  Ivory Folded beads, these beads are the ones pictured in all white!
Let me know what you think... I would love to start a class.... any interest!??
Don't forget to comment, say hello or follow! =)

Sunday, July 18, 2010

Reproductions... Amazing!

I wanted to try my hand at reproducing early jewelry pieces, like form the pre Colombian era, and pre Classic eras. Those hard to find ornately decorated and expertly crafted pieces of wearable art.


I purchased a book by Daniel and Serga Nadler, Silver, from fetish to fashion. It is a book about their travels and their found love for Ethnic Jewelry, together they fell in love with each other and jewelry collecting. With their bond and love for one another they have amassed a huge collection of primer, gallery quality, pieces of Silver masterpieces.


Their collection has inspired me so much that I want to now recreate them, but in polymer clay and metals, and try my best to make them look close to the actual pieces. I have always been one to challenge myself, and this will be a challenge, as these are the finest pieces of jewelry I have seen, and they are actual pieces form their origination. They would travel to India, Pakistan, S.E, Asia, just every where, and would deal with tribes people and collectors to get the very best pieces they could find from all over the world.
This is my first try at creating with this book as inspiration... what do you think, i can use some feedback, really I could. Please feel free to comment... Thank you so much.


Friday, May 28, 2010

Chatoyant Snail Rolls! Mica Shift Tricks, The Learning Curve!

 Chatoyant (cat eye like) snakes, notice the bar of light in the very center.

Creating what looks to be a really amazing way of making my work shine and reflective.
I was crazy about mica shift technique when I first tried it. I thought how easy is this, and how beautiful. I then started reading more on the subject and how one can achieve amazing results by playing with the mica particles after being shifted. I love to read on and learn as much as I can even before even trying it out, at least that's what I do now!
The necklace and beads I created with that first tiny cane.

Well today I decided I read enough, know enough and was curious enough to finally try something other then a mica shift or skinner blend and the two intermixed. I want that reflective quality one can achieve by learning how to add depth and texture, without executing a simple ghost image, or using a stamp to disrupt the mica particles then shaving the surface level. I want this reflective quality going all the way through, the entire piece from front to back and that is something I have not yet seen in my work. 


Triangle cabochons covered with the chatoyant snail slices.
I had created a skinner blend/mica shift/metallic cane, I was experimenting and I created this incredible cane, but instead of writing down what I did, and thinking about how to best utilize this miniature cane that was so small. I instead stared to slice it and make beads out of it, I was excited to see what was inside.


Chatoyant Gold Metallic/Translucent Snail Roll.

Only to learn later that I should have sliced it extremely thin, arranged it on a sheet of base clay and rolled it out in all directions to make a large patterned sheet .... then you can start to decorate with a whole sheet instead of tiny square pieces.

 Several Metallic Chatoyant Canes, two are skinner blend metallic colors.

 Sliced Chatoyant Rolls Placed On A Sheet of Metallic clay and is covering those tiny cabs.

I want to start my blog feature called "Learning Curve" where I discuss and share my experiments and learned techniques complete with the original creators techniques and the techniques I have developed to use it in my own way. I explore and look for way to be innovative even before start to create, and would love to share, encourage and inspire others to create with aspirations of being innovative. Does that sound like something you'd like to read? Please let me know with a comment and please feel free to post your links to similar work or findings, or just post questions. I will answer all! I will get a detailed bases for this section, as I want those who post links to be innovators or at the very least explorers using Polymer Clay. Artist and enthusiasts who are bending the the curve and want to share and explore other possibilities of innovation and creation.

Miniature Mask Exchange! Who wants to participate?

I read about a miniature mask exchange, where artists created miniature masks to collect other artists work. I have seen some amazing work from you all and believe this would be amazing inspiration and it would create a niche for us as a group and a great promotion tool.

The artists involved in this online exchange would create masks and send them to a "mask master" and that master, would send each artist one of the other artists mask. And she had collected hundreds of really cool ornate miniature masks and permanently affixed them to a turquoise felt covered piece of wood and it look amazing. I would love to start a miniature mask exchange, would anyone want to participate? Please let me know,  I will start it on my own and hope others want to participate.


I love the idea of collecting other PC artists work and this seems the best way to do it, and everyone benefits! And it can become for all involved a great collection of art, so what do you say?
As you can see I am already creating miniature masks, this is my very first attempt and I am letting happen organically. I think she is going to be my Paisley Goddess! She is not pretty, but she is the Princess nest in line to the throne! =) With that nose she could be a vaudeville sensation! 


To those interested in participating, leave a comment here and we will see if we can't get this started! This exchange would be open to Polymer Clay artists only, others will be open to all artists! One thing remains the same, they Must be within 6 inches total! Don't forget to comment and be included.

Thursday, April 8, 2010

My line Origins... The beginning!


Was a flash in the pan, I was thinking about a new line and in my research I found that all areas had been tapped out. There are so many Jewelry designers out there, and so many great ideas it is getting harder and harder to come up with new ideas... ones that not have already been done.

Ideas that will catch on and hopefully become the next big thing, are not easy to come up with, and I am one who likes to come up with new uses for everyday components. It is part of my creation process, pushing and testing myself to create more with a toggle clasp then using it for it's original use. This allows me to imagine and put my creative mind to work, it is a simple yet really effective way of keeping my imagination working and sharp.

I find that my subconscious mind works better then me trying to make something happen, I leave it to my intuition to work it out or rather to do what I feel. In this way it is easy for me to continue with the more difficult task of figuring out the "mechanics" of the piece. I learned to concentrate more on the way a piece is going to lay on the body, and how it is going to behave when worn, rather then what colors it will be. Everything seems to work itself out from there.

I was not sure of anything when I started out in the early 90's creating jewelry... I just needed money and had all these crafts I knew how to do, from camp and from my mother. She owned a gift shop and we her children would make all the gifts.... Child free labor... they call it these days! =) I learned how to do just about everything, including knitting and embroidery... how embarrassing!  I mean she pushed us to finish product and stressed us out to do it!  But without that "guidance" I will call it... I would not have had the knowledge to create in the first place and would never had been able to turn my last US $300.00 into US $1,600.00 by creating beautiful necklaces and selling them at Magic Mountain... I sold every last one!

So needless to say I have learned to follow my intuition very early on and it always works for me.
So when I started to try to figure what direction to go, there were just to many visuals coming into my minds eye and was clouding my perception and making it difficult to come up with anything. So I listened to my intuition and decided to create a new beginning... Origins.... The Beginning!  And I am happy to say it is selling, I have sold 7 pieces from this line already and that is a great start for me, so I am happy and inspired!

This collection is my first break from creating with a structured technique, this collection is all about the very first pieces of personal adornment and what those pieces might have looked like. So it is interpretive on my part and the viewers part as well as they are pushed to ask, what is this... this new beginning. And do they look like they could have been created by our very first intelligent ancestors.
Do these pieces look like relics or authentic enough to pass??? You have to answer these questions, I will try my best to keep you guessing and waiting to see the next piece from my new line, Origins... The Beginning!

Friday, February 12, 2010

Silver from Fetish to Fashion! Index, Author's Note

I originally wanted to share this entire book with you all, it serves as visual inspiration and has sparked off so many different design choices and looks for me. With inspiration from original pieces of tribal and ethnic jewelry brings my mind to wonder and almost day dream of these fantastic Artisans working out their concepts design choices and components, that were usually native to their environment creating an original look from their surrounding found and crafted objects. 

However the process of scanning the pages is daunting and just hard to say the least. But there is such amazing amount of visual inspiration, that I am all giddy about sharing it, for those of you who can be inspired as I am by visual stimulation... and this is top notch visual stimulation. 
So I need some encouraging words from you, if you are interested in seeing and being inspired by these works of art then please say so. Let me know that this is something I need to share with all of you, and you would come back to read it to be inspired as i have been. This will encourage me to continue scanning each page... one by one, if I know that others are benefiting from this it will inspire me to share more and not simply forget about it! 

So come on let me know, I will however clean up the scanned pic's and make them as presentable as possible, as not to distort the pic's and text. I also will leave the files really large so you can click to enlarge and read. All this takes so much of my time, but if I do it as I am creating it becomes less of a taks and become more of an inspiration boost! Yea or Nea, either way leave me a comment and subscribe, if you don't want to miss a page!


Sophia Lauren models an Elsa Perretti, Cuff bracelet. 

Tuesday, February 2, 2010

Silver from Fetish to Fashion!

 Cover Photograph by Chance ye
Cover design by Orit Mardkha


Silver... From Fetish to Fashion, Danile & Serga Nadler

This is an amazing book! It was incredibly expensive but I had to have it, I call it a splurge kind of like rewarding myself for being productive. I also thought I could "right it off" so in my head it was a done deal!
But when I opened up and started to read and see the gorgeous photographs of authentic pieces from each region covered is just invaluable, so my investment has already paid off.

I feel that this book has so much to offer, and so much visual inspiration that it would be ashamed if I kept it to myself. So I am thinking of featuring this book on my blog as a way of sharing the inspiration of these authentic intricate, ethnic and some what Tribal looking Masterpieces! I will start to feature this book for all to see and be inspired by, but I need you artists and craft enthusiasts to comment, and let me know you are interested, otherwise I will not go through the trouble of scanning each page for naught! Below is the inside of the jacket, read it and let me know if you want to be inspired!???

If you want to be inspired COMMENT! =) 
Click pic  to read! 
  

Wednesday, January 13, 2010

Where were you in 1992? I believe I was starting a trend!

What were you doing in 1992? Where you creating or doing anything creative?

I recently had a friend find a jewelry box of mine that was in his storage for years. And it is pieces of work I did back in 1992-2001. I was so excited to see what was inside the jewelry box, as I could not even remember what I was doing in 2001. It is inspiring to see that I am still being creative and doing what I love, however I am not nearly as successful as I once was. I am still creating and being productive today with as much gusto as before... not bad for an old man.

The pieces of jewelry in the box were pieces from my line called "Hippie Chick" it was my very first attempt at creating pieces of jewelry for a lower end market.
I wanted to create with steel wire, crystals and hematite only, thinking this would keep my costs down but also loving the juxtaposition and understanding what that meant for the first time.
I wanted to concentrate my efforts on a line of jewelry that was fun, fresh funky and young, and I was sure I could come up with affordable and innovative pieces of affordable, fashionable jewelry that was geared toward the younger crowd.

 I saw the amazing numbers of how many tweens there were supporting the pop idols of the 90's and spending tens of millions and thought I'd like some of that money. Because I remember as a kid wanting something and saving every penny until I could buy it. Teens are loyal when they like something they are gonna get it, even if they have to save up to get it. And I wanted some of that loyalty and Hippie Chick was going
to be my "fortune" or "my ship coming in" Oh well!
 It is amazing what thoughts came to my mind when I opened the jewelry box and viewed the pieces inside. I had not seen them since I created them, I had no idea what had happen to them like so many other designs. But when I saw these pieces, instantly I remembered everything about their conception and creation. These were my very first shot at creating with all steel wire and wrapping my own beads and creating every component of the piece. I was looking for something new, something lower end and affordable. and that is when my line Hippie Chick was born.

It took a back seat for about 8 years as I became really into learning more metal techniques and applications, and soldering was a big obsticle for me to get over, but I did eventually and mastered it as well. But it is an expensive trade to work with metals there are so many components you simply can not do with out, and I found that rather restricting.I took about two years to learn the process of fabricating my own Fimo stones,I took several online master courses, as i was trying to broaden my creative horizons. Eventually I cam back to my Hippie Chick line and attcked it full force.

I remember I was so excited about returning to my new line, and creating with new techniques... that I invited my best friend over to view the first two pieces and was already working on the third one which was pink and purple wire. Which was my first homage piece...and it was for Pink! =)

I was listening to Pinks album Misunderstood loving the song "Family Portrait" and started creating this piece for her. I had plans to give it to her at her concert, but never made it. I guess I was so full of myself back then that I thought she'd actually give a damn. Well actually back then I had a primarily celebrity clientele and my jewelry was already featured in a Janet Jackson video and the movie "clueless" so I thought Pink was or would have been right in line with everyone else. And back then I was Victor Allen Designs, you could see my wire signature piece a VA made out of wire on one of the pic's.            


This is what my wire work looks like today! I am still working with wire, and just found 7 more necklace of early Hippie Chick ... Off to list then now! Please say hello and comment if you'd like.